Optimized runtime (Custom JRE)
Objective
In this lab, you will take a closer look at how to create a custom Java runtime environment (JRE) for the UnicornStore application.
Prerequisites
Context
The Java Platform Module System (JPMS) was introduced with JDK 9, which split up tools.jar and rt.jar into 70 modules. This modularization can be used to create runtime environments that contain only the required modules (including transitive dependencies) of an application. This reduces the overall runtime size and increases performance during application startup.
1. Copying the modified Dockerfile
We have already prepared a Dockerfile with the necessary steps to build and deploy the UnicornStore application with a custom JRE.
Copy the Dockerfile to the current application folder:
cd ~/environment/unicorn-store-spring
cp dockerfiles/Dockerfile_04_optimized_JVM Dockerfile
2. Changing the source code and pushing the image
You are now going to change the application code of unicorn-store-spring/src/main/java/com/unicorn/store/controller/UnicornController.java to identify the new version of the application deployment.
Change the contents of the getWelcomeMessage function to identify the new version of the application:
@GetMapping("/")
public ResponseEntity<String> getWelcomeMessage() {
    return new ResponseEntity<>("Welcome to the Unicorn Store - from Optimized JVM!", HttpStatus.OK);
}
AWS Cloud9 does not auto-save your files. Please ensure to save your files before deploying any changes via Ctrl+S or the top menu File→Save all.
Start the build for the container image. While it is building, you can move to the next step and inspect the Dockerfile.
cd ~/environment/unicorn-store-spring
docker buildx build --load -t unicorn-store-spring:latest .
IMAGE_TAG=i$(date +%Y%m%d%H%M%S)
docker tag unicorn-store-spring:latest $ECR_URI:$IMAGE_TAG
docker tag unicorn-store-spring:latest $ECR_URI:latest
docker push $ECR_URI:$IMAGE_TAG
docker push $ECR_URI:latest
Take a look at the modified Dockerfile.
FROM public.ecr.aws/docker/library/maven:3.9-amazoncorretto-17-al2023 as builder

RUN yum install -y tar gzip unzip

COPY ./pom.xml ./pom.xml
RUN mvn dependency:go-offline -f ./pom.xml

COPY src ./src/
RUN mvn clean package && mv target/store-spring-1.0.0-exec.jar target/store-spring.jar && cd target && unzip store-spring.jar

RUN jdeps --ignore-missing-deps \
    --multi-release 17 --print-module-deps \
    --class-path="target/BOOT-INF/lib/*" \
    target/store-spring.jar > jre-deps.info

# Adding jdk.crypto.ec for TLS 1.3 support
RUN truncate --size -1 jre-deps.info
RUN echo ",jdk.crypto.ec" >> jre-deps.info && cat jre-deps.info

RUN export JAVA_TOOL_OPTIONS=\"-Djdk.lang.Process.launchMechanism=vfork\" && \
    jlink --verbose --compress 2 --strip-java-debug-attributes \
    --no-header-files --no-man-pages --output custom-jre \
    --add-modules $(cat jre-deps.info)

FROM public.ecr.aws/amazonlinux/amazonlinux:2023.2.20231026.0
RUN yum install -y shadow-utils

COPY --from=builder target/store-spring.jar store-spring.jar
COPY --from=builder custom-jre custom-jre

RUN groupadd --system spring -g 1000
RUN adduser spring -u 1000 -g 1000

USER 1000:1000

# OpenTelemetry agent configuration
ENV OTEL_TRACES_SAMPLER "always_on"
ENV OTEL_PROPAGATORS "tracecontext,baggage,xray"
ENV OTEL_RESOURCE_ATTRIBUTES "service.name=unicorn-store-spring"
ENV OTEL_IMR_EXPORT_INTERVAL "10000"
ENV OTEL_EXPORTER_OTLP_ENDPOINT "http://localhost:4317"

EXPOSE 8080
ENTRYPOINT ["./custom-jre/bin/java","-jar","-Dserver.port=8080","/store-spring.jar"]
As mentioned in the first chapter, the Dockerfile utilizes a multi-stage build approach. The initial stage (beginning at line 1) involves building the application and a customized runtime. This custom runtime is created based on the dependencies listed in jdeps (refer to lines 11-14).
In the first step, we analyze the entire classpath of the application and write down all module dependencies in a file called jre-deps.info. You might have noticed that we explicitly added jdk.crypto.ec. This module contains the implementation of the SunEC security provider, which is essential for TLS support. However, it is not easy to determine from the classpath analysis that this module is needed, which is why we include it at this stage.
The jre-deps.info is used as input for jlink (line 20 - 23) in order to build a custom runtime. The goal of this is to reduce the size as much as possible, that's the reason the runtime is compressed and no header files and no man-pages are included.
In the second stage of our build (line 28 - 29), we copy the JAR file of the application as well the custom runtime to the target image.
3. Re-deploying the application
After pushing the new image to ECR, you can re-trigger the deployment of the application:
kubectl rollout restart deploy unicorn-store-spring -n unicorn-store-spring
kubectl rollout status deployment unicorn-store-spring -n unicorn-store-spring
4. Testing the application
Run the following API call to verify that the new version of the application has been deployed successfully:
- Export the Service URL for later use:
export SVC_URL=http://$(kubectl get svc unicorn-store-spring -n unicorn-store-spring -o json | jq --raw-output '.status.loadBalancer.ingress[0].hostname')
curl --location --request GET $SVC_URL'/' --header 'Content-Type: application/json'; echo
![]()
5. Retrieving the results
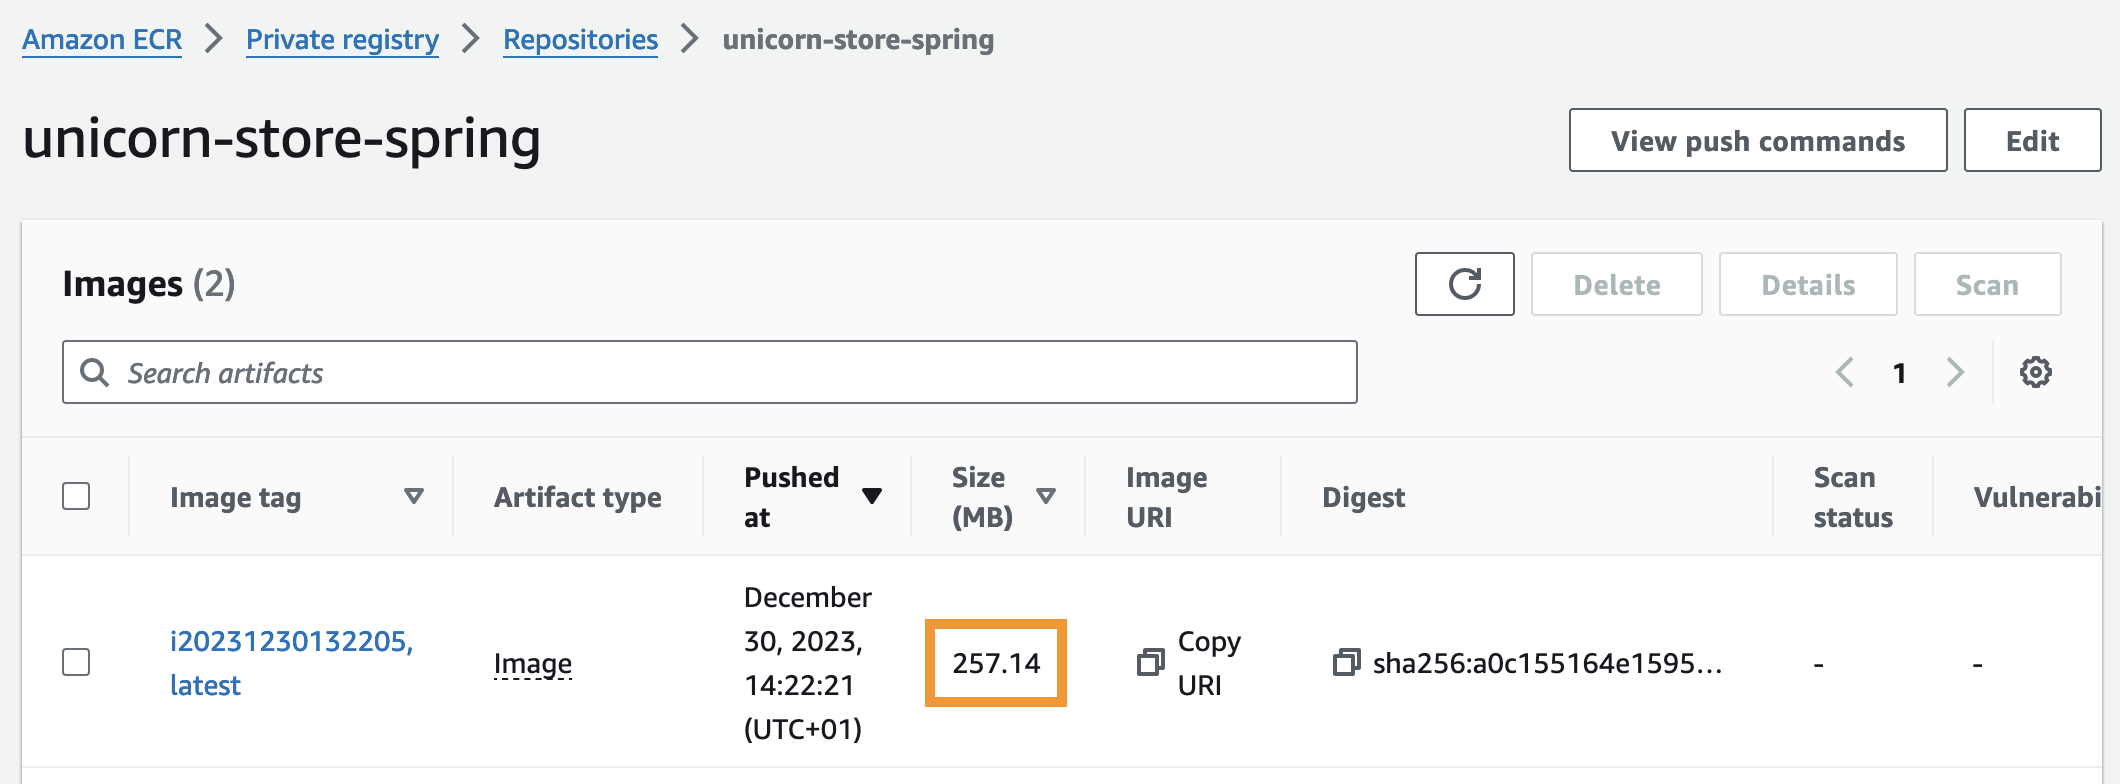
Verify the new application image size in the Amazon ECR console:
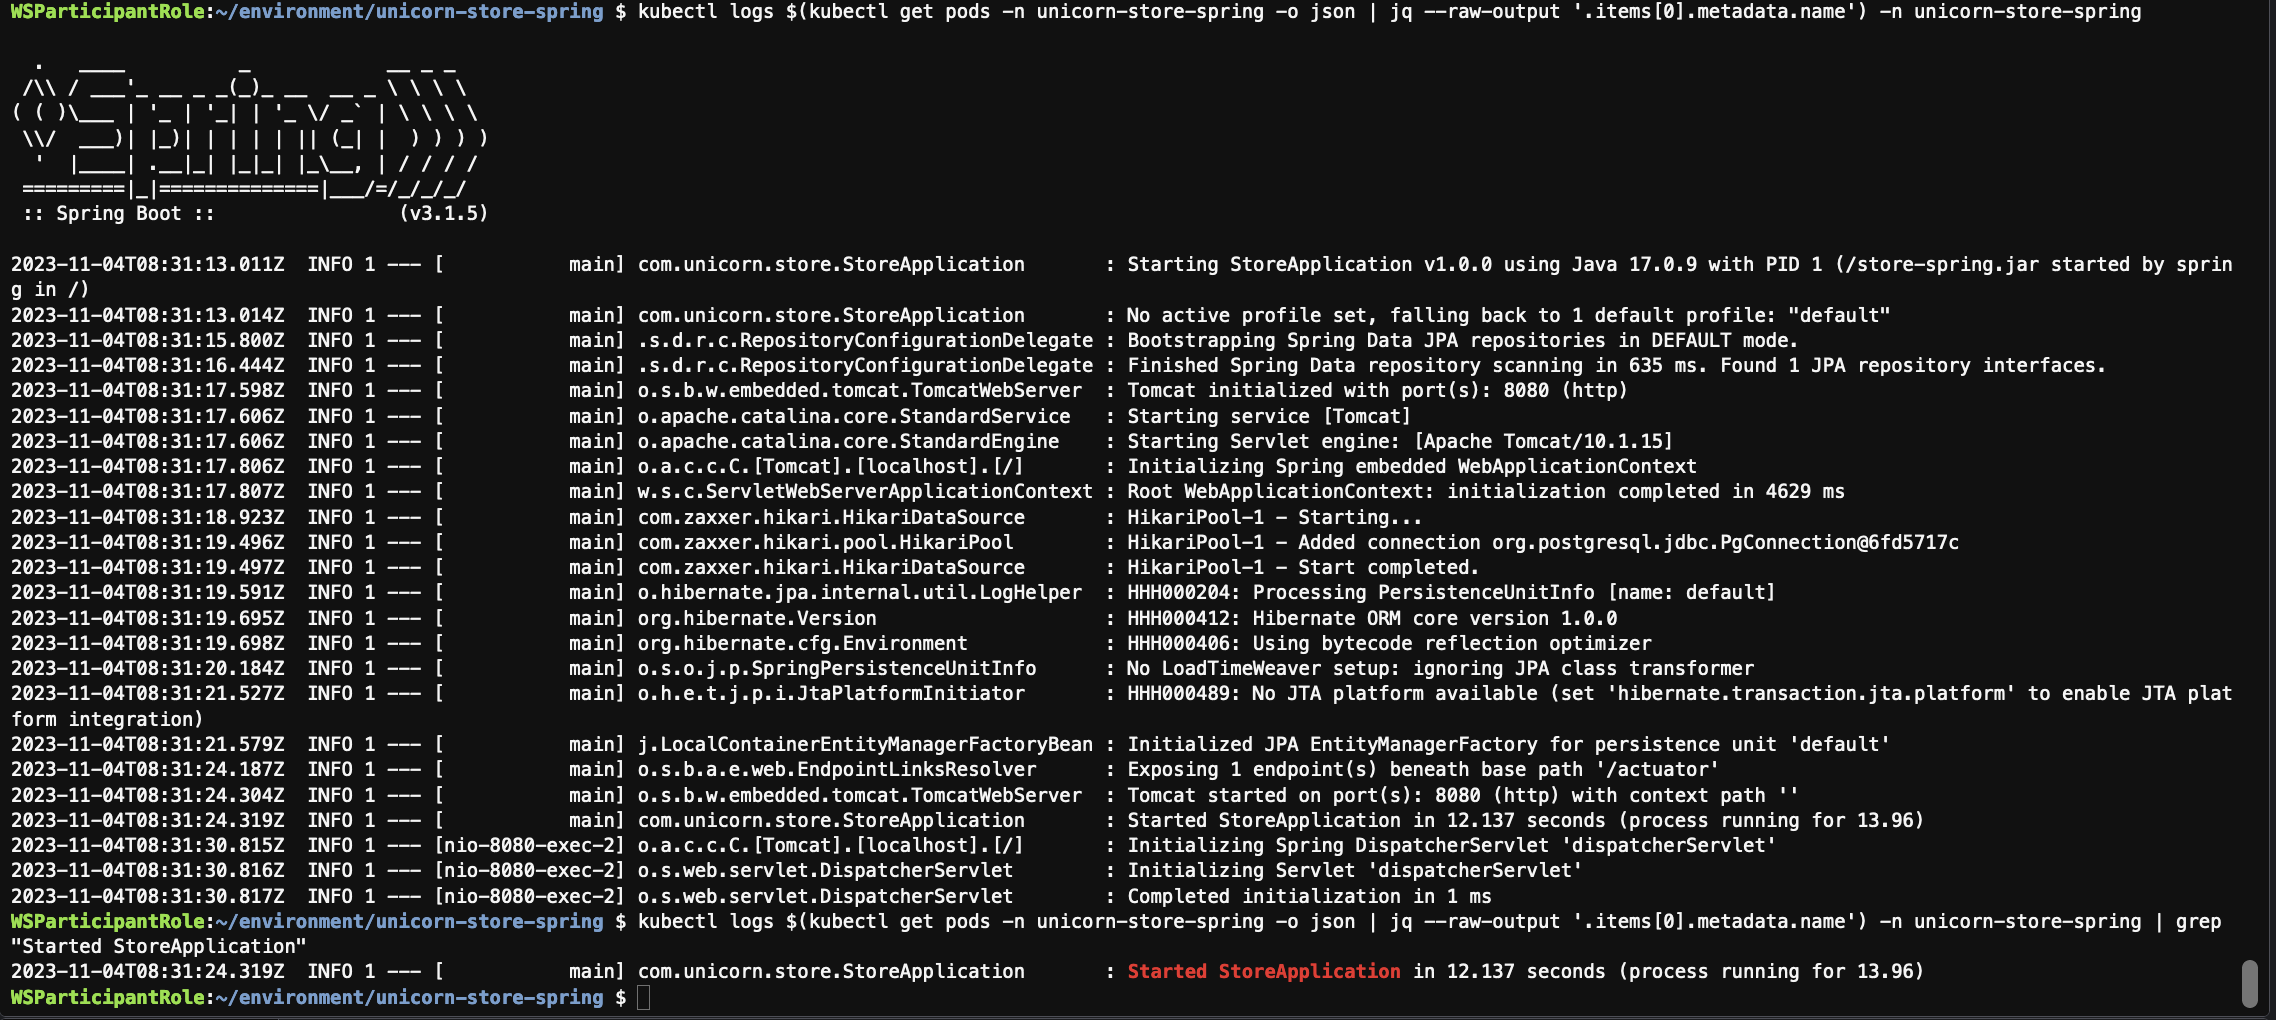
Retrieve the logs for the application as outlined in the previous section. Below you can find an example starting time after the optimization of the Amazon EKS deployment:
kubectl logs $(kubectl get pods -n unicorn-store-spring -o json | jq --raw-output '.items[0].metadata.name') -n unicorn-store-spring
kubectl logs $(kubectl get pods -n unicorn-store-spring -o json | jq --raw-output '.items[0].metadata.name') -n unicorn-store-spring | grep "Started StoreApplication"
Conclusion
As you can see, we managed to decrease the size of the container image from 380 MB to 257 MB. The application startup time also improved by a small margin.