Setting up the Development Environment
Objective
This guide shows you how to set up the necessary tools and environment to leverage the python-fastapi-demo-docker project. For more samples, we recommend exploring the sample app collection (e.g., Python, Flask, FastAPI, PostgreSQL) at docker/awesome-compose.
Use the tabs below to see the steps for the specific environment where you are running this lab.
- AWS Workshop Studio
- Local Computer
If you are attending an AWS hosted event, you will have access to a new AWS account in AWS Workshop Studio. You will use this AWS account to run the labs in this workshop. The account is destroyed when the AWS event is finished.
Workshop Studio deploys a Visual Studio enviroment running on top of an EC2 instance. To run the workshop, you will connect to this Visual Studio environment and execute commands in the Visual Studio terminal.
There is no need to install CLI tools or configure IAM permissions. You will be using the IAM permissions of the EC2 instance role where Visual Studio is running. All required tools and permissions have been installed and configured in this EC2 instance.
Prerequisites
- Access the event via the one-click join event link provided by the event operator as part of an AWS hosted event.
- OR via the Workshop Studio join URL with the 12 digit event access code distributed by an event operator.
- Carefully review the terms and conditions associated with this event.
1. Workshop Studio Event Dashboard
After joining the AWS event, you should see the Event Dashboard page with the event information and workshop details. You will need to use the options in this page to access workshop resources while working on workshop labs. Here’s a quick rundown on these options:
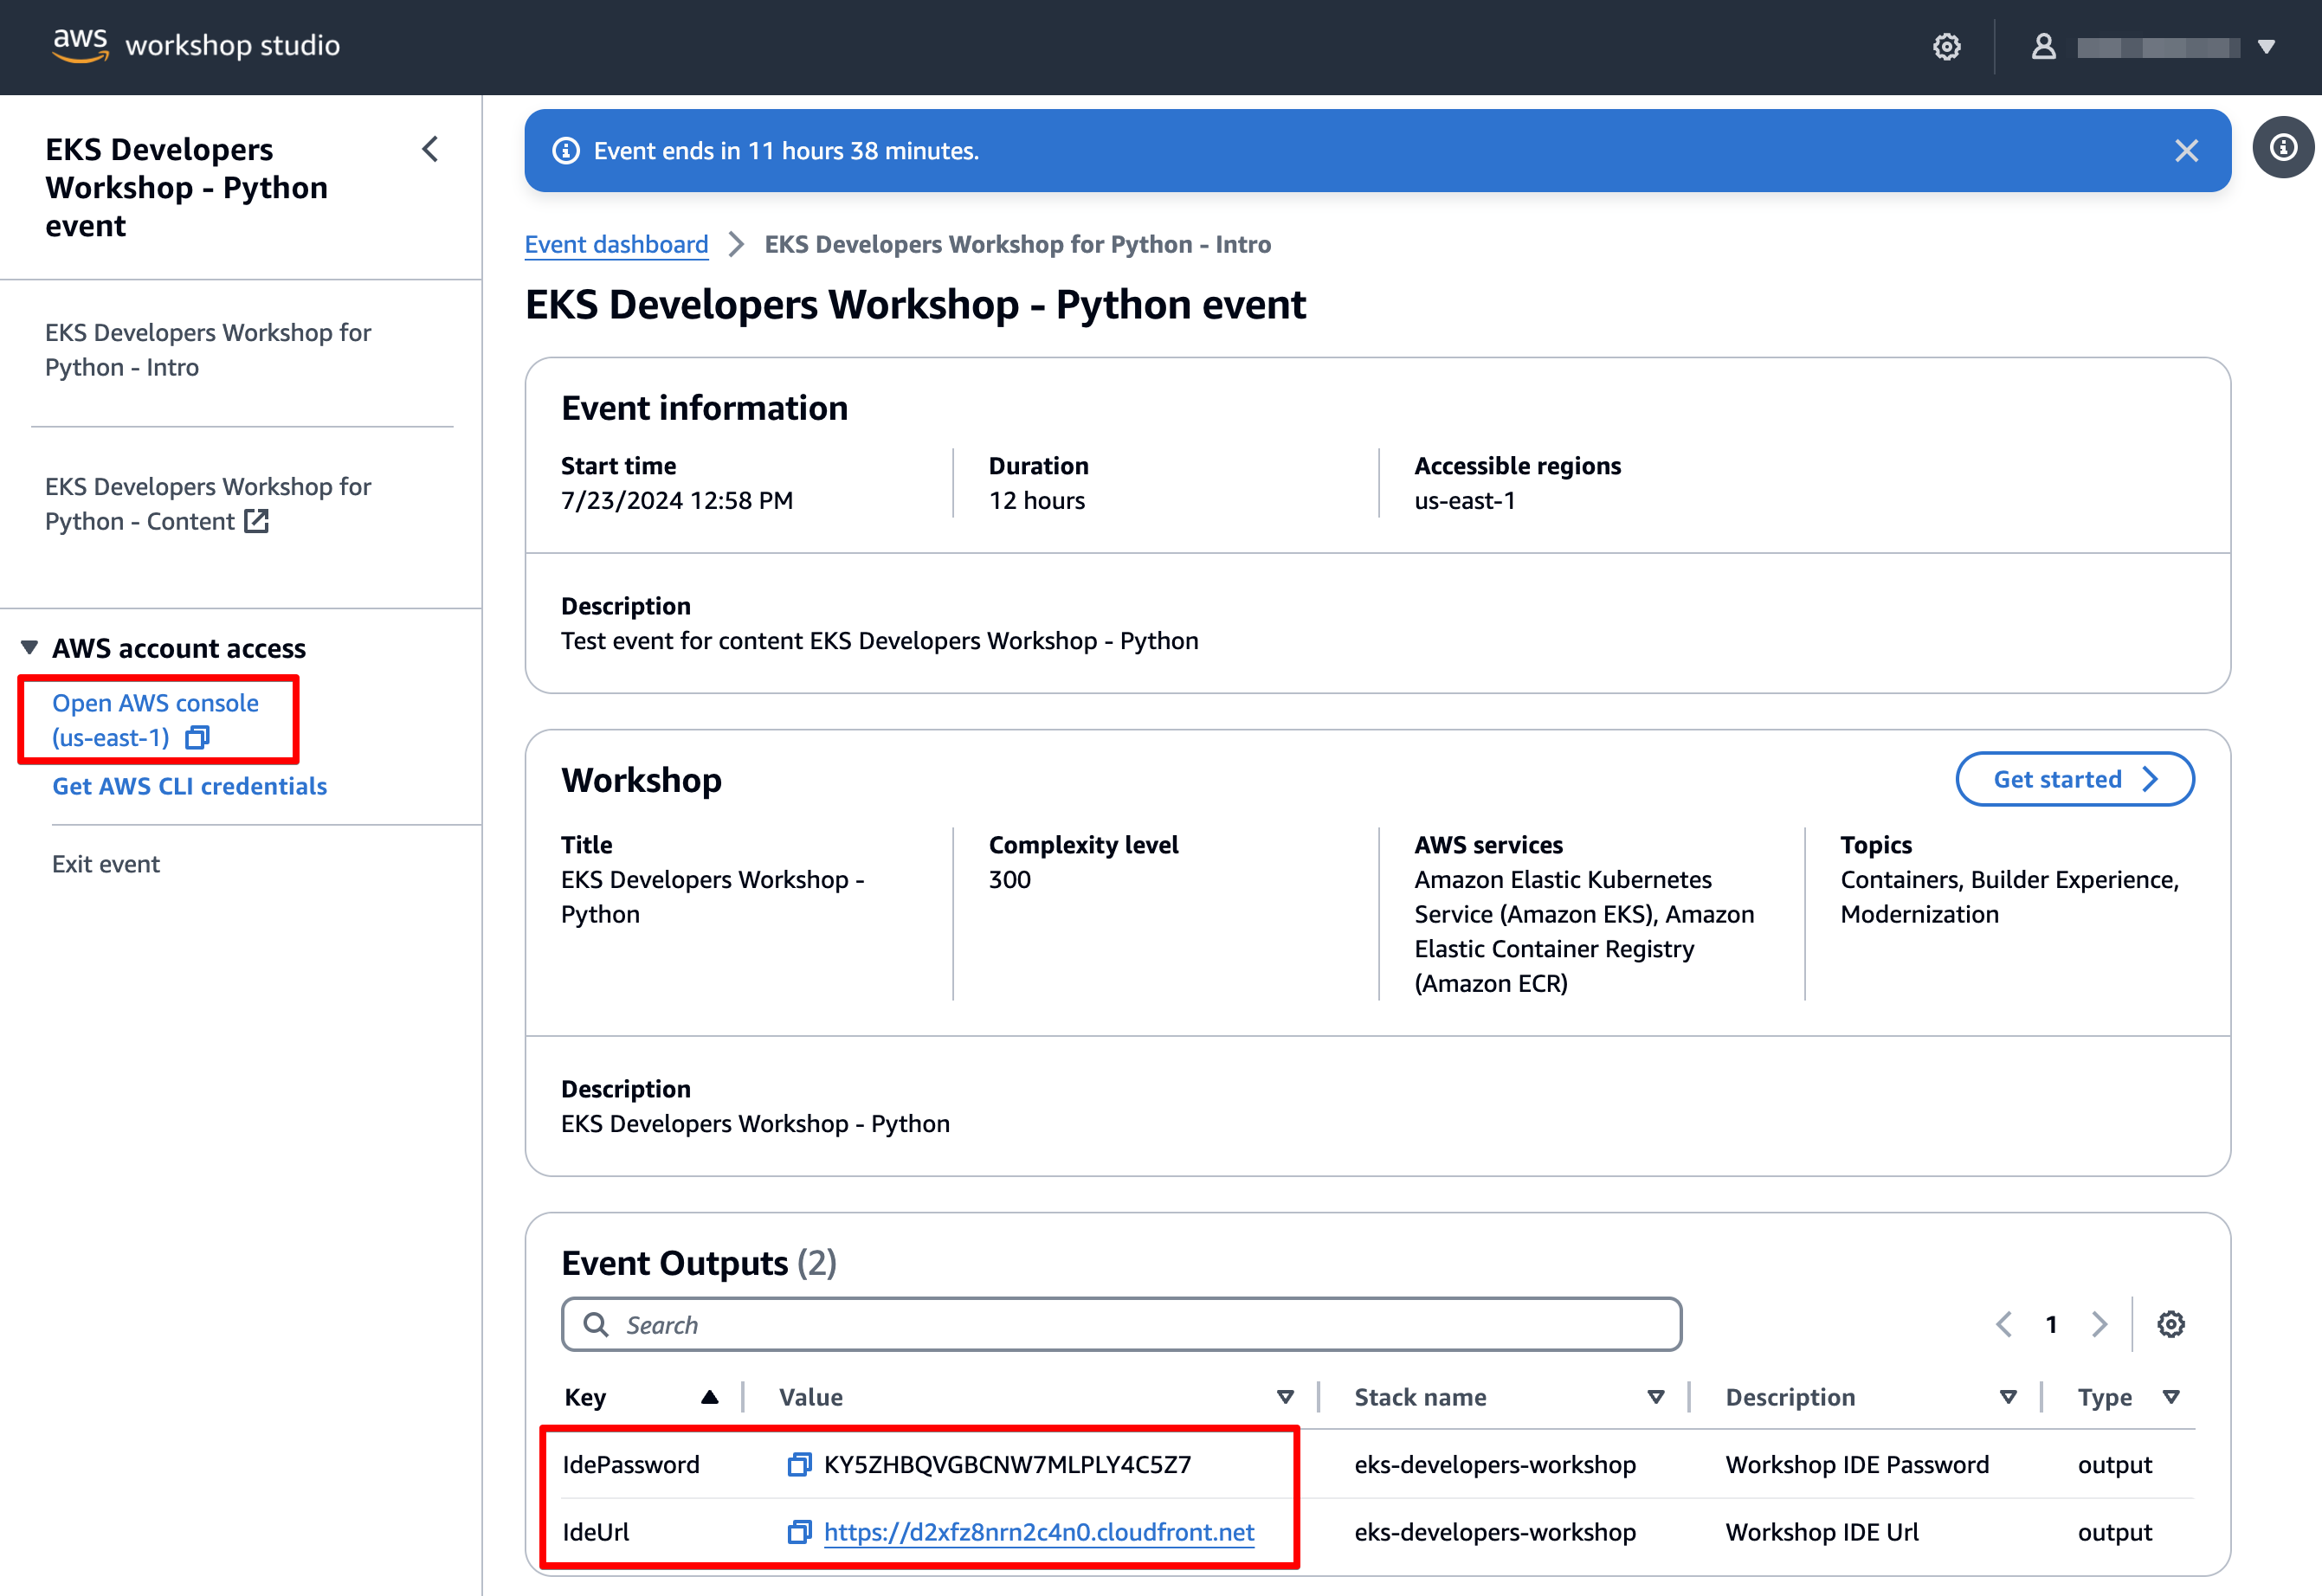
On the left side of the event page there is a section titled AWS account access with details to access the AWS account provisioned for you by Workshop Studio.
- Open AWS Console - use this option to open the AWS Console.
The workshop deploys Visual Studio Code in an EC2 instance running in this AWS account.
- IdeUrl and IdePassword - use these options to access Visual Studio Code.
2. Accessing Visual Studio terminal
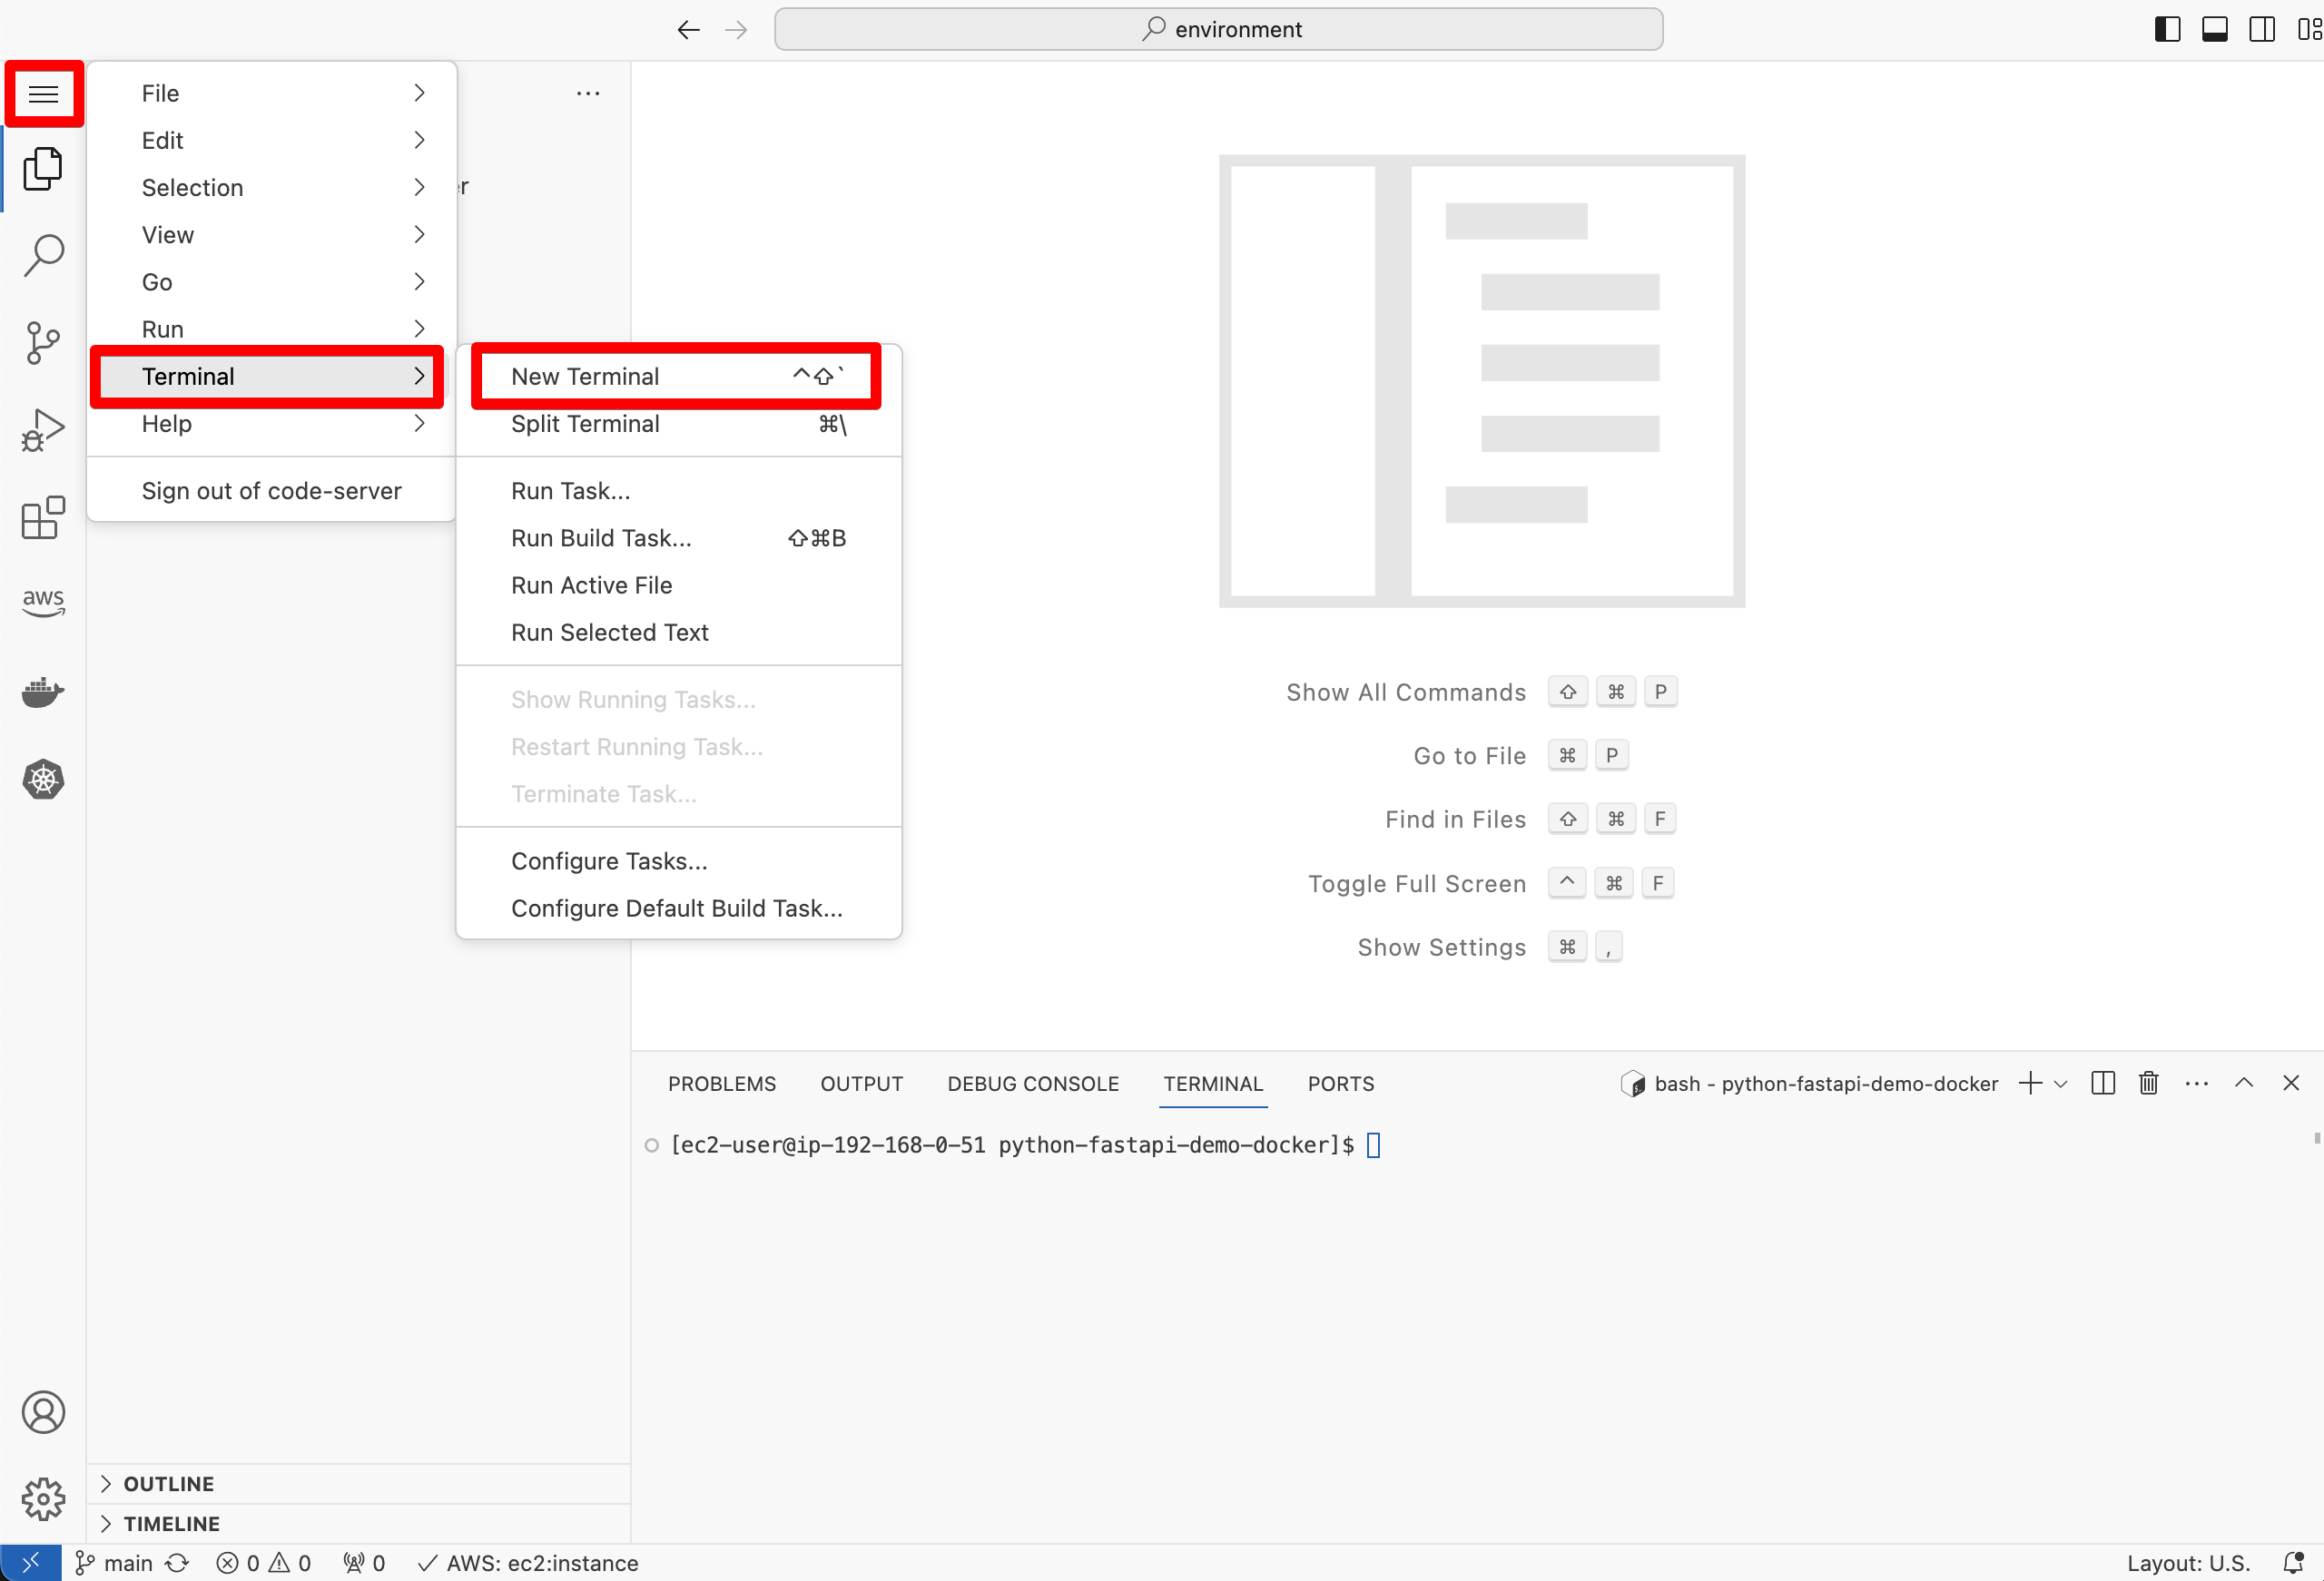
First, click on IdeUrl in your web browser and log in using IdePassword to open the Visual Studio Code session.
Next, open VS Code terminal by accessing Menu -> Terminal -> New Terminal. Note that environment variables and IAM permissions have already been configured in VS Code terminal.
Now, you are ready to start the labs in this workshop.
The steps below will help you set up the enviroment in your local computer, using your own AWS Account.
In this workshop there will be a number of AWS resources created in your account. These resources will incur cost and will be billed to your AWS Account. Make sure you delete all resources after completing the workshop to avoid unnecessary costs. The steps to clean up resources are available in the last section of the workshop Cleaning Up Resources
1. Installing Required Tools
To facilitate a beginner-friendly introduction to Kubernetes, this workshop is structured with user-friendly tools at its core. Central to this approach is the use of eksctl, an Infrastructure as Code (IaC) tool that allows you to update the control plane, manage add-ons, and oversee worker node updates.
If you're planning to complete the workshop in full, make sure you've set up the following tools on your local machine.
- Install Docker Desktop
- Create a DockerHub Account
- Install Python 3.9+
- Install the AWS CLI
- Install minikube
- Install eksctl
- Install kubectl
- Install Helm
2. (Optional) Alternative Tools
Optionally, if you are using macOS catalina (10.15) or higher, you can use Finch, instead of Docker. Finch is an open source tool for local container development. It is available for macOS on Intel and Apple Silicon. Finch and Docker can be installed together; however, for performing the workshop exercises, we recommend using either Finch or Docker consistently for all the steps.
3. Configuring the Shell Environment
First, configure your AWS credentials to be able to create AWS resources from the command line. Configure the AWS CLI by running:
aws configure
Enter your AWS credentials:
AWS Access Key ID [None]: AKIAIOSFODNN7EXAMPLE
AWS Secret Access Key [None]: wJalrXUtnFEMI/K7MDENG/bPxRfiCYEXAMPLEKEY
Default region name [None]: us-east-2
Default output format [None]: json
4. Setting Up the Application
Create a folder for the environment, clone the python-fastapi-demo-docker repository and navigate into the project directory:
mkdir ~/environment
cd ~/environment
git clone https://github.com/aws-samples/python-fastapi-demo-docker.git
If you prefer not to use git, you can alternatively download the Zip file.
5. Creating the .env File
We'll be heavily reliant on environment variables to ease the set-up process throughout this workshop.
First, navigate into the project directory and make a copy of the example environment variables file.
cd ~/environment/python-fastapi-demo-docker
cp .env.example .env
Now update AWS variables in the .env file you just created using the AWS Account ID and region that you will use for this workshop:
AWS_ACCOUNT_ID=012345678901
AWS_REGION=us-east-1
6. Import Environment Variables
Next, from the root directory of the 'python-fastapi-demo-docker' project, import all environment variables by running the following commands.
macOS
set -o allexport; source .env
printenv
Windows
@echo off
for /f "usebackq delims=" %%x in (".env") do set "%%x"
set
Linux
set -a; source .env; set +a
printenv
7. Install Other Tools (Recommended)
-
Consider installing the Docker VS Code Extension. This tool simplifies the management of container images and allows you to access container logs and console output directly from VS Code 🔥.
-
Verify the Finch installation by running the following commands:
finch vm init
finch run public.ecr.aws/finch/hello-finch:latest